


Luxury Bathroom Remodel Tips to Stop Moisture and Mold Early
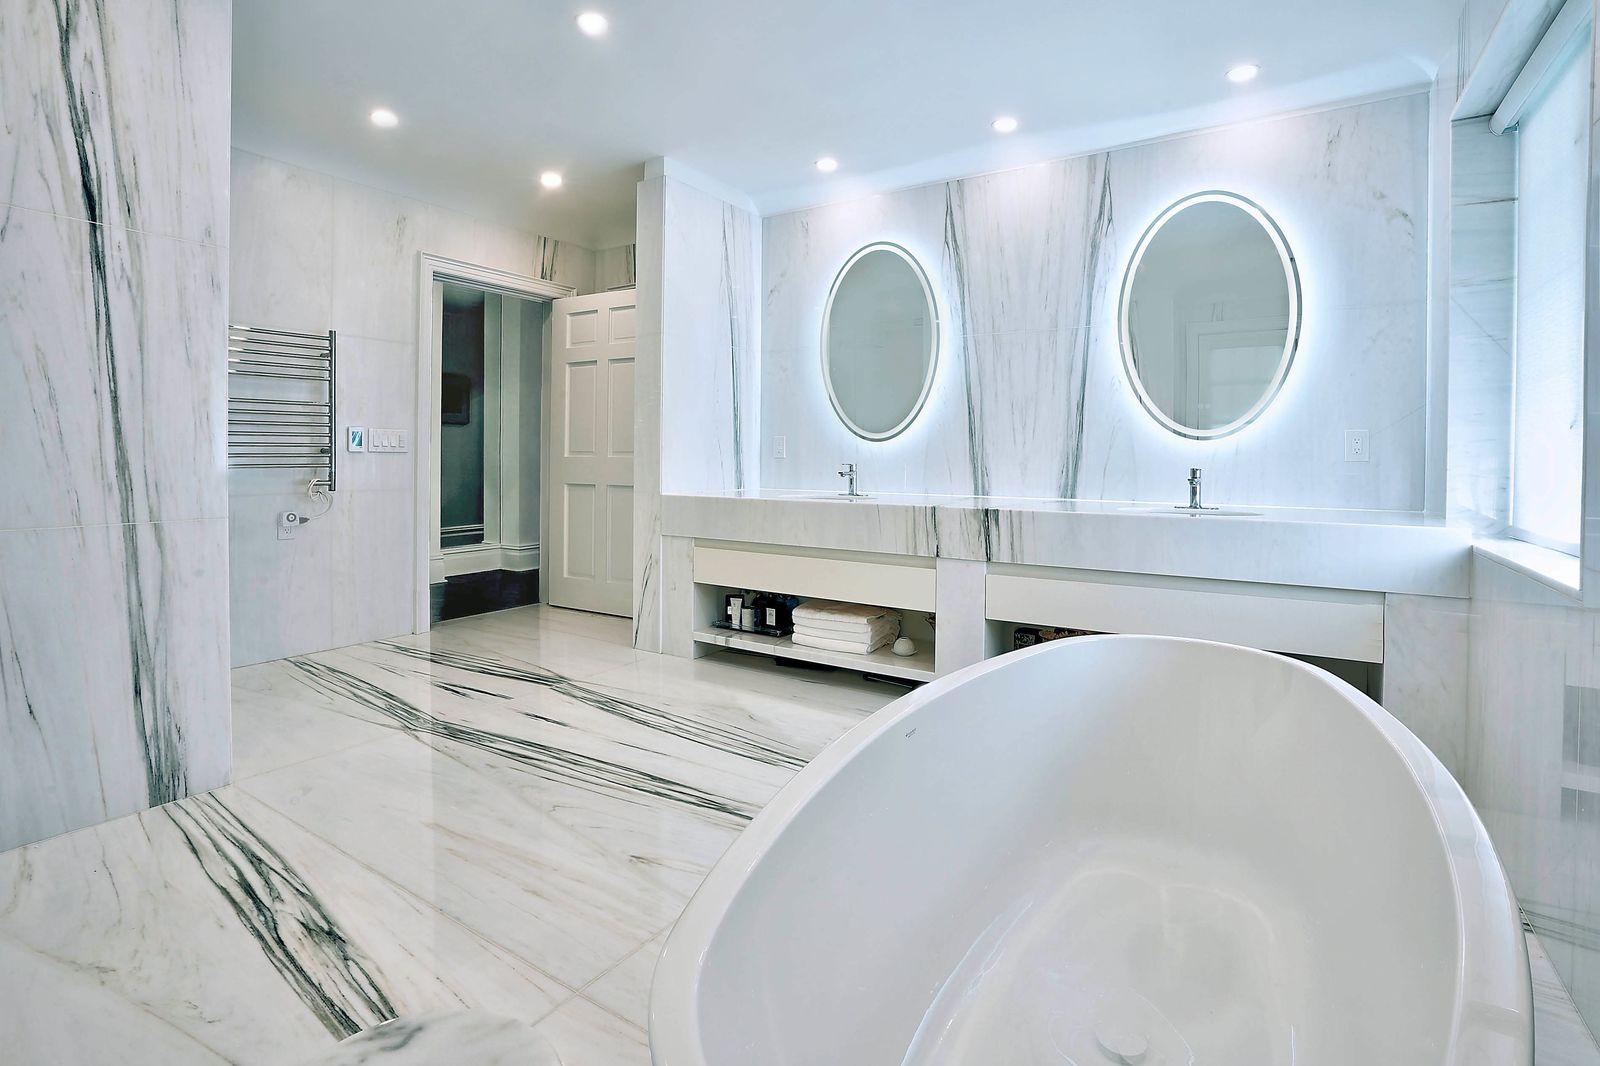
high end bathroom designs, cost of luxury bathroom remodel
How Can You Prevent Moisture and Mold Problems in a Luxury Bathroom Remodel?
Quick Answer
A luxury bathroom remodel remains dry when waterproofing, drainage, ventilation, insulation, plumbing, and field inspections are designed as one connected system. Tile and grout protect the visible surface, but the concealed assembly determines whether water drains, evaporates, or becomes trapped inside walls and floors.
High-end bathroom designs often include steam showers, body sprays, heated floors, benches, recessed niches, curbless entries, and large glass enclosures. Each feature creates additional joints, penetrations, and moisture loads. Preventing mold therefore requires more than selecting water-resistant finishes. The project team must map moisture paths, specify compatible materials, confirm slope, test waterproofing, verify exhaust airflow, and inspect every concealed layer before it is covered.
A Finished Bathroom Can Still Be Failing
A bathroom can look complete while its structure is slowly absorbing water.
A polished stone wall may conceal an unsealed valve penetration. A curbless shower may allow water to travel beyond its intended drain field. An exhaust fan may sound powerful while moving very little air through a long or restricted duct.
By the time a homeowner notices a musty odor, peeling paint, darkened grout, or a swollen cabinet edge, moisture may already have reached the subfloor, insulation, framing, wiring, or wall sheathing.
Water does not need to enter through one dramatic leak. Repeated spray, vapor, condensation, capillary movement, and weak drying can create a daily wetting cycle. A luxury bathroom remodel should therefore be treated as a wet-room assembly—not as a collection of expensive products.
The objective is straightforward: direct liquid water toward drains, keep humid air away from cold cavities, and give damp surfaces a practical way to dry.
Miss those controls, and the room can become a repair project disguised as a premium finish package.
Begin With a Moisture-Path Survey
The first technical task is not choosing tile. It is identifying how water and vapor can enter, move through, and remain inside the bathroom assembly.
Separate the Four Main Moisture Sources
Bathroom moisture commonly reaches concealed materials through four different paths:
Bulk water comes from shower spray, plumbing leaks, overflowing fixtures, or failed drain connections.
Capillary movement allows water to travel through small pores, joints, and gaps in materials.
Water vapor moves through assemblies because of differences in temperature and vapor pressure.
Humid air leakage carries moisture through openings around pipes, lights, fans, soffits, windows, and service chases.
Each path requires a different response. A waterproof membrane cannot correct weak exhaust airflow. A powerful fan cannot repair a failed drain connection. Sealant around a valve cannot solve condensation inside an uninsulated exterior wall.
Moisture control works only when the source and movement path are correctly identified.
Investigate Existing Conditions Before Final Pricing
Older bathrooms may already contain wet insulation, deteriorated sheathing, leaking supply lines, damaged subflooring, or poorly sealed exterior cavities.
Moisture meters, thermal imaging, plumbing tests, visual inspection, and selective openings can help identify suspect areas. However, no single reading should be treated as proof of the cause. Questionable areas should be compared with dry reference materials and investigated in context.
The cost of a luxury bathroom remodel becomes harder to control when concealed damage is discovered after contracts are signed and finish materials are ordered. Early investigation helps separate known repairs from uncertain conditions and allows an appropriate contingency to be discussed before demolition begins.
Treat Waterproofing as One Connected Assembly
Tile is not waterproofing.
Grout is not waterproofing.
Sealant alone is not a complete water-control strategy.
The primary barrier sits behind or directly beneath the finished surface. It must continue across the shower floor, walls, corners, benches, niches, curbs, thresholds, drains, pipe openings, mixer valves, and every other penetration.
A waterproof surface with one unprotected opening is not a complete assembly.
Use a Documented, Compatible System
A luxury bathroom remodel should use a manufacturer-approved waterproofing assembly or a documented combination of products whose interfaces have been confirmed as compatible.
Sheet membranes, liquid-applied membranes, foam boards, reinforcing fabrics, collars, sealants, drains, and bonding materials may have different requirements for:
-
Surface preparation
-
Application thickness
-
Cure time
-
Seam overlap
-
Temperature and humidity
-
Drain connection
-
Flood testing
Mixing unrelated products without verifying compatibility can create weak bonds, uncertain cure periods, or warranty disputes. The project specification should identify the complete assembly rather than naming only a membrane brand.
Inspect the Interfaces First
Failures frequently begin where two systems meet.
Mixer valves, shower arms, glass anchors, niche corners, bench joints, drain flanges, thresholds, and curbless entries contain cuts, fasteners, changes in plane, and movement. These details deserve more attention than large uninterrupted wall areas.
When two systems meet, inspect the joint before it disappears.
Use a Field-Control Table
A concise inspection table turns concealed work into a sequence that can be reviewed and documented.
|
Control Area |
Common Failure |
Field Verification |
Best Inspection Stage |
|
Waterproofing |
Open seam, pinhole, or missed collar |
Visual review and approved flood test |
Before tile installation |
|
Drainage |
Flat ledge or reverse slope |
Level, straightedge, and slope check |
Before and after waterproofing |
|
Ventilation |
Low delivered airflow |
Airflow reading at the grille |
After fan and duct installation |
|
Thermal control |
Condensation on cold surfaces |
Insulation and air-sealing review |
Before wall closure |
|
Plumbing |
Slow leak at a fitting or valve |
Pressure test and visual inspection |
Before insulation and drywall |
|
Steam enclosure |
Vapor leakage at ceilings or penetrations |
Assembly and penetration review |
Before finish installation |
|
Service access |
Hidden valve, pump, or control |
Access-panel verification |
Before cabinetry or wall closure |
The objective is not paperwork for its own sake. The objective is to prevent the next layer from hiding an unresolved defect.
Design the Slope Before Selecting the Drain
Water follows gravity, not visual intention.
Every horizontal surface exposed to water should direct it toward a drain or back into the shower. That includes the shower floor, bench, niche shelf, curb, sill, threshold, and other ledges.
A flat niche shelf can hold water after every shower. A bench sloped toward the wall can push moisture into a vulnerable joint. A threshold pitched toward the bathroom can send water beyond the enclosure.
These are not finish problems. They are geometry problems.
The Waterproof Layer Must Also Slope
A common defect occurs when the finished tile appears to slope correctly, but the waterproof layer beneath it remains flat.
Water that reaches the membrane can then sit below the finish instead of moving toward the drain. Over time, the assembly may remain damp even when the visible surface appears dry.
During a luxury bathroom remodel, slope should be shown in the construction details and checked before waterproofing is covered. The team should verify both the finished surface and the concealed drainage plane.
Curbless Showers Require Hydraulic Planning
Curbless showers are common in high-end bathroom designs, but removing the curb also removes a major containment feature.
A successful curbless layout requires coordination between:
-
Structural floor depth
-
Drain type and location
-
Shower dimensions
-
Floor-heating systems
-
Glass placement
-
Door swing
-
Spray direction
-
Bathroom-floor elevation
Before approving the layout, the team should answer three questions:
Where will water travel if the drain slows?
Can direct spray reach the doorway or adjacent cabinetry?
Will the surrounding bathroom floor contain water if the enclosure door remains open?
A curbless shower should be evaluated as a drainage field, not merely as a visual detail.
Treat Steam Showers as a Different Moisture Condition
A steam shower does not expose the enclosure to the same conditions as an ordinary shower.
Steam creates sustained heat, high humidity, and vapor pressure across walls and ceilings. Small penetrations that may tolerate occasional spray can become significant vapor paths under repeated steam exposure.
Continue the Assembly Across Walls and Ceilings
The vapor-management strategy should continue across the complete enclosure, including walls, ceilings, corners, control penetrations, steam outlets, lighting openings, benches, and door interfaces.
The ceiling design also deserves attention. Flat or poorly planned surfaces can allow condensed water to collect and drip unpredictably.
Materials and installation procedures should follow the requirements of the selected steam-shower system and waterproofing manufacturer. Ordinary shower assumptions should not be carried into a steam enclosure without verification.
Protect Equipment Access
Steam generators, pumps, control valves, traps, and related components require planned access for inspection and maintenance.
High-end bathroom designs should not sacrifice service access for appearance. A concealed component that cannot be reached can turn a small repair into major finish removal.
The access strategy should be resolved before walls, millwork, or cabinetry are closed.
Measure Exhaust Airflow at the Grille
A fan label describes performance under test conditions. It does not prove how much air is moving through the completed bathroom.
Long ducts, crushed sections, sharp elbows, leaking joints, restrictive exterior caps, and dirty grilles can reduce delivered airflow. A loud fan can still perform poorly.
Check the Complete Air Path
A luxury bathroom remodel needs both exhaust air and a path for replacement air to enter the room.
If the bathroom door seals tightly and no transfer path exists, the fan may work against negative pressure. This can reduce airflow even when the fan itself is correctly sized.
Delivered airflow should be measured at the grille after installation. When the result is lower than expected, inspect the duct route, joints, termination, and replacement-air path before simply installing a larger fan.
Use Controls That Support Drying
Timers and humidity-sensing controls reduce dependence on memory. Exhaust should continue after bathing until the bathroom returns close to its normal indoor humidity level.
Steam showers, large wet rooms, and enclosed stalls may require different exhaust strategies from smaller bathrooms. The design should consider room volume, enclosure configuration, duct length, fixture use, and applicable mechanical requirements.
The goal is not simply to remove odors. The goal is to reduce the time that damp surfaces remain wet.
Control Condensation at Cold Surfaces
Warm, humid air releases water when it contacts a surface below the dew point.
Exterior sheathing, metal window frames, under-insulated ceilings, supply pipes, recessed cabinets, and wall cavities can become condensation zones. These surfaces may remain hidden long after the visible mirror and tile have dried.
Use Open Walls as a Diagnostic Window
Demolition provides temporary access to areas that may not be visible again for decades.
While the bathroom is open, inspect insulation and air sealing around:
-
Exterior walls
-
Windows
-
Ceilings
-
Soffits
-
Plumbing penetrations
-
Exhaust ducts
-
Recessed fixtures
-
Mechanical chases
Small gaps can carry humid air into colder cavities. Once the walls are closed, the new finish may hide the pathway without correcting it.
The cost of a luxury bathroom remodel should account for necessary repairs to wet insulation, damaged sheathing, open air paths, and deteriorated framing discovered during demolition. New finishes can conceal those conditions, but they cannot correct them.
Coordinate Heated Floors With Waterproofing and Drainage
Heated floors can improve comfort and drying, but they add another layer that must be coordinated with the substrate, waterproofing, drain height, controls, and floor elevations.
The heating system should not interrupt the waterproofing strategy or create an unplanned buildup at a curbless entry. Sensor placement and control access should also be documented before tile installation.
Heating can support drying, but it should never be treated as a substitute for correct drainage or ventilation.
A warm, poorly drained surface is still a wet surface.
Select Materials According to Exposure
Not every bathroom surface experiences the same moisture conditions.
Direct wet zones require waterproof backing and assemblies designed for repeated water exposure.
Splash zones need finishes and joints that tolerate frequent wetting and cleaning.
Damp zones need cabinetry, coatings, trim, and hardware that resist swelling, corrosion, or finish breakdown.
Material approval should be based on exposure, not appearance alone.
Ask Three Questions Before Approving a Finish
For each material, determine:
How does it react to repeated water exposure?
Which cleaning products or maintenance methods can damage it?
Can the material and its backing dry after normal use?
Natural stone may require specific sealing and cleaning procedures. Wood panels need protected edges and controlled exposure. Cabinet toe kicks and wall panels should not terminate where standing water can reach unprotected material.
Premium does not automatically mean moisture-resistant.
Document the Work Before It Disappears
Photograph the drain connection, valve collars, membrane seams, corners, benches, niches, pipe penetrations, heating layout, insulation, and service access before finishes conceal them.
Record relevant flood tests, plumbing pressure tests, airflow readings, corrective work, and inspection approvals.
Documentation serves several purposes. It confirms that concealed details were reviewed, supports future maintenance, helps locate hidden components, and creates a record if questions arise later.
Inspect the layer before the next layer hides it.
What Should Be Verified Before Tile Installation?
Before tile is installed, the project team should confirm that:
-
The substrate is stable and prepared for the selected system.
-
All seams, corners, fasteners, and penetrations are treated.
-
Benches, shelves, curbs, and thresholds slope correctly.
-
The membrane connects properly to the drain.
-
Required cure periods have been completed.
-
Testing follows the selected manufacturer’s instructions and applicable inspection requirements.
-
Any defects found during testing are corrected and retested.
-
Concealed work has been photographed and documented.
Tile installation should begin only after the water-control assembly is complete. The finish should protect the system; not become the system.
Conclusion
The most expensive bathroom failures usually begin where no one is looking.
A luxury bathroom remodel resists moisture only when waterproofing, drainage, ventilation, insulation, plumbing, material selection, and field review operate as connected controls. Visible finishes should follow that technical plan, never replace it.
Mold rarely begins with one dramatic event. It develops when several small weaknesses align: a flat shelf, an open valve collar, poor airflow, a cold cavity, unprotected wood, or a missed inspection before wall closure.
Break that chain early.
Map the moisture paths. Specify compatible assemblies. Confirm slope. Measure delivered airflow. Protect cold surfaces. Test concealed work. Record the results.
This coordinated design-build approach also reflects how WA Construct plans remodeling projects: design decisions, construction sequencing, service access, material selections, and field documentation are considered together rather than handled as isolated tasks.
Before approving the finishes for a premium bathroom, ask to see the waterproofing specification, drain details, ventilation plan, testing requirements, and concealed-work inspection schedule. Those documents reveal more about long-term performance than the tile selection alone.
When the concealed assembly works, the finished bathroom has a sound foundation for daily use.
Frequently Asked Questions
1. Can existing mold be covered during a bathroom renovation?
No. The moisture source should be identified and corrected before the affected area is enclosed. Damaged materials should be evaluated, removed, cleaned, or replaced as appropriate before new insulation, wallboard, waterproofing, or finishes are installed.
2. Do high-end bathroom designs require more ventilation?
Not automatically, but steam showers, large enclosures, body sprays, and multiple wet zones can increase the bathroom’s moisture load. Ventilation should be designed around room size, fixture use, enclosure configuration, duct resistance, and delivered airflow—not appearance or fan noise.
3. What affects the cost of a luxury bathroom remodel after moisture damage is found?
Repair costs depend on how far the moisture has traveled, which materials are affected, and how difficult they are to access. Damage involving framing, electrical systems, insulation, plumbing, cabinetry, or specialty finishes can require broader removal and reconstruction.
4. Is grout a complete waterproof barrier?
No. Grout helps fill tile joints, but the waterproofing membrane and drain assembly control water behind the finished surface. A tiled shower should not depend on grout or surface sealant as its only moisture barrier.
5. Should a curbless shower receive a flood test?
A flood test is commonly used to evaluate containment, membrane continuity, and drain bonding before tile conceals the assembly. Testing should follow the waterproofing manufacturer’s instructions and any applicable inspection requirements for the project.
6. How long should the bathroom fan run after bathing?
The fan should continue until humidity approaches the room’s normal indoor level and wet surfaces have begun drying. Timers or humidity-sensing controls can help maintain consistent drying without relying on someone to remember to leave the fan running.
7. What is the first moisture-control step in a luxury bathroom remodel?
Begin by mapping liquid-water sources, vapor loads, cold surfaces, drainage paths, plumbing penetrations, and areas with limited drying potential. That survey should guide the waterproofing, ventilation, insulation, and inspection strategy.
8. Why do steam showers require different planning?
Steam creates sustained heat, humidity, and vapor pressure across walls and ceilings. The enclosure therefore needs a compatible vapor-management strategy, carefully treated penetrations, appropriate material selections, and accessible mechanical equipment.
9. Can heated bathroom floors prevent mold?
Heated floors may improve comfort and help surfaces dry, but they cannot correct reverse slope, plumbing leaks, failed waterproofing, or inadequate ventilation. They should support a complete moisture-control system rather than replace one.
10. What should homeowners inspect before the bathroom is finished?
Ask to review the waterproofing details, drain connection, wet-surface slopes, insulation, exhaust duct, plumbing tests, service-access locations, and photographs of concealed work. The best time to correct a hidden defect is before tile, drywall, glass, or cabinetry blocks access.

 English
 Arabic
 French
 Spanish
 Portuguese
 Deutsch
 Turkish
 Dutch
Dutch
 Italiano
 Russian
 Romaian
 Greek
Greek