


Vinyl Siding Installation: Everything You Need to Know Before You Start
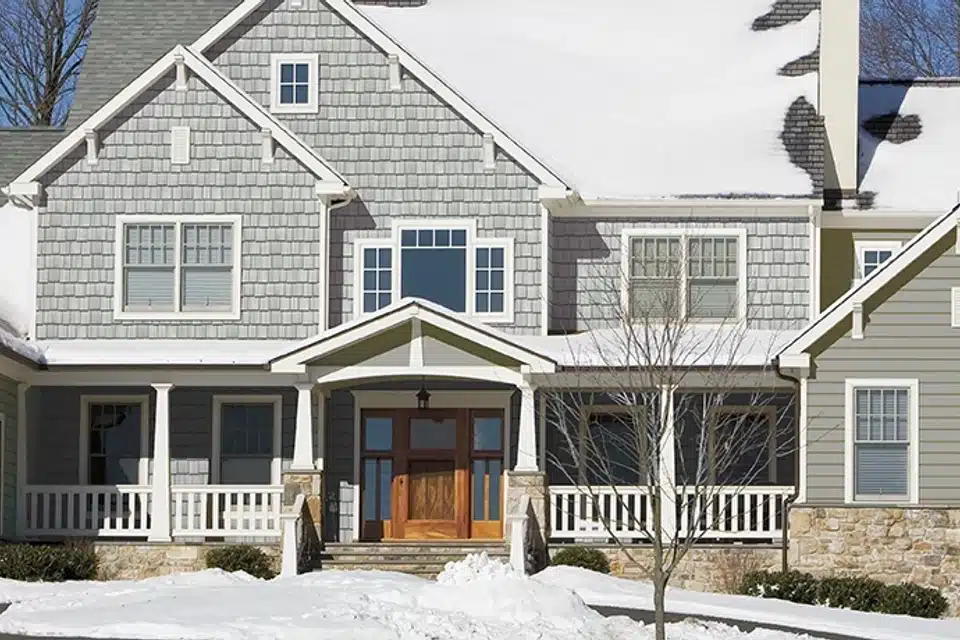
Vinyl Siding Installation: Everything You Need to Know Before You Start
Replacing the siding on your home is one of the most significant exterior decisions you will make as a homeowner. It affects how the home looks, how well it is protected from Connecticut's weather, how much it costs to maintain, and what it is worth when you eventually sell. Understanding how vinyl siding installation actually works, what the process involves, and what separates a quality job from a poor one puts you in a much stronger position to make the right decision and choose the right contractor.
Why vinyl became the dominant siding material in Connecticut
Connecticut homeowners have been choosing vinyl over wood and aluminum for decades, and the reasons have only strengthened over time. The region's climate is genuinely demanding on exterior materials. Winters bring repeated freeze-thaw cycles that cause materials to expand and contract continuously. Spring delivers sustained heavy rainfall. Summer humidity puts moisture pressure on every surface exposed to the outside air.
Wood siding, despite its natural appeal, absorbs moisture and requires repainting every three to five years to stay ahead of rot and deterioration. Aluminum siding dents, fades, and loses its finish over time. Vinyl neither absorbs moisture nor requires painting. Its color is manufactured into the material during production rather than applied as a surface coat, which means it does not peel, chip, or fade under normal exposure conditions.
Over 50 years of product development have produced vinyl formulations that handle Connecticut's climate reliably across a 30 to 40 year lifespan. At Creative Home Improvement LLC, we have installed house vinyl siding on hundreds of Connecticut homes since the material first became widely available, and we have seen firsthand how well it performs decade after decade in Fairfield and New Haven Counties.
What vinyl siding installation actually involves
Many homeowners assume that vinyl siding installation means simply nailing new panels over the old ones and calling it done. In reality, a professional installation is a multi-step process that begins well before the first panel goes on the wall and ends with a thorough inspection of every joint, corner, and transition point on the exterior.
Step one: removal of existing siding
The first and most important step in any quality vinyl siding installation is removing the existing siding completely. This is not optional in most cases, and any contractor who proposes installing vinyl directly over old siding without a compelling structural reason should be asked to explain their reasoning carefully.
Removing the old siding exposes the wall sheathing beneath, which allows the contractor to inspect for moisture damage, rot, mold, pest activity, and any structural issues that have been developing behind the cladding. In Connecticut's wet climate, wall cavities frequently show evidence of moisture intrusion that has been occurring undetected for years. Installing new siding over a compromised wall surface does not fix the underlying problem. It hides it, allows it to continue, and eventually leads to a much more expensive repair when it finally becomes visible again.
Step two: wall inspection and repair
Once the old siding is removed, every section of wall sheathing is inspected carefully. Any areas showing rot, moisture staining, soft spots, or pest damage are replaced with new sheathing before any further work proceeds. This step is where the long-term performance of the new siding is either protected or compromised. Cutting it short to save time is one of the most common ways contractors reduce their own costs at the homeowner's expense.
Fascia boards, window trim, door casings, and any other wood elements around the perimeter of the exterior are also evaluated at this stage. Rotted or damaged trim is replaced before the new siding is installed so that the completed job has a clean, sound substrate at every edge and transition point.
Step three: housewrap installation
After the wall surface is confirmed sound, a new weather-resistive barrier, commonly called housewrap, is installed over the sheathing where required. Housewrap is a breathable membrane that allows moisture vapor from inside the wall cavity to escape to the exterior while preventing bulk water from outside from entering the wall from behind the siding. It is a critical component of the wall assembly that is frequently skipped by contractors who are working too quickly or too cheaply. A properly installed housewrap extends the life of the siding and the wall structure beneath it significantly.
Step four: starter strips and corner posts
Before any siding panels are installed, starter strips are fastened along the bottom of the wall to provide the first course of siding with a clean, level, and properly angled seat. Corner posts are installed at every outside and inside corner to provide a finished channel into which the ends of the siding panels are inserted. Getting these components level and plumb is essential because every course of siding that follows is set relative to these reference points. A starter strip or corner post that is even slightly off level compounds its error with every course installed above it.
Step five: panel installation
Vinyl siding panels are installed from the bottom of the wall upward, with each course overlapping the one below it. Each panel is fastened through a pre-punched slot near the top of the panel using a nail or screw placed in the center of the slot. This center placement is critical because it allows the panel to expand and contract horizontally with temperature changes without buckling or pulling away from the wall. A panel fastened too tightly or at the edge of the slot cannot move freely with temperature cycling and will eventually distort.
The panels are locked together along their bottom edge, with each course snapping into the course below. The interlocking system creates the visual texture of the profile while sealing out wind and driving rain. Proper panel overlap, consistent course spacing, and correct fastener placement are all visible indicators of installation quality that an experienced eye can assess before the job is even finished.
Step six: trim, flashing, and finishing
The final stage of vinyl siding installation involves installing all trim pieces around windows, doors, under soffit lines, and along any architectural transitions. Proper flashing at window and door openings is installed to direct any water that finds its way behind the siding face away from the wall opening rather than into the framing. J-channel trim is installed wherever the siding terminates at a window, door, or soffit, providing a clean finished edge and a channel that directs water down and away from the opening.
This finishing stage is where the quality of the overall job becomes most visible. Trim that is tight, properly caulked at every joint, and consistent in its alignment across the facade gives the home a finished, professional appearance. Trim that is loose, misaligned, or inadequately sealed creates both aesthetic and moisture management problems that become progressively worse over time.
Understanding vinyl siding profiles and what they mean for your home
Vinyl siding is not a single product. It is a category that includes a range of profiles, each of which creates a different visual character on the exterior of the home. Choosing the right profile for your home's architectural style and your personal aesthetic preferences is one of the most enjoyable parts of planning a house vinyl siding replacement project.
Horizontal lap siding
Horizontal lap is the most widely installed siding profile in Connecticut and across the northeastern United States. It replicates the look of traditional wood clapboard and is available in widths ranging from three and a half inches to eight inches. Narrower profiles create a finer, more traditional texture that suits colonial and cape-style homes particularly well. Wider profiles have a cleaner, more contemporary character that works well on larger, more modern structures.
Dutch lap siding
Dutch lap is a variation of horizontal lap that incorporates a concave bevel cut into the upper edge of each panel, creating a distinctive shadow line below each course. The additional depth and shadow created by the Dutch lap profile gives the exterior more visual texture and architectural interest than standard lap without changing the overall character of the home significantly.
Board and batten
Board and batten is a vertical siding profile that creates a clean, strong vertical line on the exterior. It has grown significantly in popularity across Connecticut over the past several years as the farmhouse and craftsman aesthetic has become more widely adopted in both new construction and renovation. It is frequently used as an accent profile on gables, dormers, and entry features alongside a horizontal lap primary profile to create visual contrast and architectural hierarchy.
Shake and shingle profiles
Vinyl shake and shingle profiles replicate the appearance of cedar shingles without any of the maintenance requirements associated with real wood. They are commonly used on upper gable sections, dormers, and other accent areas to add texture and visual interest. On smaller cottages and bungalows, they are sometimes used as the primary siding profile.
Insulated vinyl siding
Insulated vinyl siding has a layer of rigid expanded polystyrene foam bonded to the back of each panel during manufacturing. This foam layer fills the gap between the panel and the wall surface, adding thermal resistance to the wall assembly and significantly improving the panel's resistance to impact. Insulated panels feel noticeably more solid on the wall than standard panels and reduce heat transfer through the wall in both directions, which lowers heating and cooling costs. For Connecticut homeowners concerned about energy efficiency, insulated vinyl siding installation near me is one of the most practical and cost-effective wall performance upgrades available in 2026.
What drives the cost of vinyl siding installation
The cost of a vinyl siding installation project varies based on several factors that are specific to each home. Understanding these factors helps homeowners evaluate quotes accurately and recognize when a price is genuinely competitive versus when something important has been omitted from the scope.
Size of the home
The total square footage of siding required is the primary driver of material cost. Larger homes require more panels, more trim pieces, and more labor hours than smaller ones. Most siding contractors price projects per square foot of siding installed, with the total price determined by the measured area of the home's exterior walls less the area of windows and doors.
Profile and product grade selected
Entry-level vinyl siding panels are thinner, lighter, and carry shorter warranties than premium-grade products. Mid-grade and premium panels are thicker, more rigid, better at retaining color over time, and carry longer manufacturer warranties. Insulated vinyl costs more than standard panels but adds energy performance value that recouped over the life of the installation. The profile selected also affects cost, with shake and shingle profiles typically priced higher than standard lap due to their more complex manufacturing.
Condition of the existing wall
The extent of sheathing repair, fascia replacement, and trim work required once the old siding is removed is one of the most variable cost factors in any installation. Homes with significant moisture damage behind the existing siding require more repair work before the new siding can be installed. A contractor who provides a fixed quote without first removing a section of the old siding to inspect the wall condition beneath is either very experienced at estimating or is leaving themselves room to add charges later.
Number of stories and architectural complexity
Multi-story homes require scaffolding or extension ladders and take longer to work on safely than single-story structures. Homes with complex rooflines, many dormers, bay windows, or numerous trim transitions require more cuts, more trim pieces, and more labor time than simple rectangular structures.
How vinyl siding installation connects to roofing and gutters
Siding does not function independently from the other components of a home's exterior. It works as part of a complete system alongside the roof, windows, and gutters. Understanding how these systems interact helps homeowners make better decisions about when to replace each component and why coordinating the work matters.
The roof is the first line of defense against water. It sheds rainfall and snowmelt toward the gutters at the eaves. The gutters collect that water and channel it away from the walls and foundation. The siding seals the wall surface against any water that does not follow the intended path. When any one of these systems fails, it puts additional stress on the others.
A qualified residential roofing contractor evaluating a home's exterior often identifies siding issues at the same time as roofing concerns, and vice versa. At Creative Home Improvement LLC, our team evaluates all connected systems during every project assessment because the most cost-effective and lasting approach to exterior improvement is always a coordinated one. Replacing siding alongside roofing and seamless gutters means all three systems are new, properly sized for each other, and working together from the first rain after installation.
How to find the right contractor for vinyl siding installation near me
The quality of a vinyl siding installation depends as much on the contractor who installs it as on the product itself. A premium panel installed incorrectly will underperform and create moisture problems. A mid-grade panel installed correctly will protect the home effectively for decades. Here is what to look for when evaluating contractors for vinyl siding installation near me in Connecticut.
Licensing and insurance
Any contractor performing siding work in Connecticut must hold a valid state contractor's license and carry both general liability insurance and workers compensation coverage. Always ask for the license number and verify it through the Connecticut Department of Consumer Protection before signing any agreement. Creative Home Improvement LLC holds CT License #562280 and carries full insurance on every project.
Written, itemized estimates
A professional contractor provides a written estimate that breaks down material costs, labor, disposal of old siding, any sheathing repair allowances, and trim work separately. Vague single-number quotes that do not itemize the scope of work leave room for disputes and unexpected charges after the job begins.
Local experience and verifiable references
A contractor who has been installing house vinyl siding in Connecticut specifically for many years understands how the local climate affects installation decisions, which products hold up best in the region, and how to address the specific challenges that Connecticut homes present. Ask for references from recent local projects and follow up on them before committing.
Warranty on both product and labor
The manufacturer's material warranty covers defects in the product itself. A labor warranty from the contractor covers the installation work. Both are necessary for genuine long-term protection. At Creative Home Improvement LLC, every vinyl siding installation we complete is backed by a Lifetime Warranty on both the product and the installation labor.
Conclusion
A well-executed vinyl siding installation is one of the most durable and cost-effective exterior investments a Connecticut homeowner can make. Understanding what the process involves, which product choices matter most, and what separates a genuine professional installation from a shortcut job gives you the knowledge to evaluate your options clearly and choose a contractor who will do the work right. Creative Home Improvement LLC has been installing house vinyl siding across Connecticut since 1974 with a Lifetime Warranty on every project. If you are planning a siding project and want an honest assessment and a transparent quote, call us today for a free in-home consultation.
Frequently asked questions (FAQs)
Should old siding be removed before installing vinyl?
Yes in most cases. Removing old siding allows the contractor to inspect and repair the wall sheathing beneath before the new siding goes on. Installing over damaged or rotted sheathing hides the problem and allows it to worsen behind the new panels.
How long does vinyl siding installation take?
Most single-family homes in Connecticut take three to five days for a full vinyl siding installation. Larger homes or those with complex rooflines and many trim transitions may take slightly longer. Creative Home Improvement LLC provides a clear timeline before work begins.
What thickness of vinyl siding is best?
Premium-grade vinyl panels are typically 0.044 to 0.046 inches thick. Thicker panels are more rigid, more impact-resistant, and carry longer warranties. For Connecticut's climate, choosing a mid-grade or premium panel thickness is a worthwhile investment over entry-level options.
Can vinyl siding be installed in winter in Connecticut?
Vinyl becomes more brittle in cold temperatures and can crack if handled incorrectly. Most professional contractors prefer to schedule installations between late spring and early fall. Consult your contractor about timing if your project needs to proceed during colder months.
Does vinyl siding installation require a permit in Connecticut?
Permit requirements vary by municipality. Some Connecticut towns require a permit for full siding replacement and some do not. Creative Home Improvement LLC handles all permit requirements as part of every project so you do not need to navigate that process yourself.
What is insulated vinyl siding and is it worth it?
Insulated vinyl has a layer of rigid foam bonded to the back of each panel. It improves thermal resistance, reduces outside noise, and makes panels more impact-resistant. For Connecticut homeowners focused on energy efficiency, it is a worthwhile upgrade that pays back over time through lower heating and cooling bills.
How do I know if my current siding needs replacing?
Key signs include cracks, warping, or gaps in the panels, paint peeling on interior walls near exterior surfaces, visible mold or moisture staining on the wall face, and rising energy bills without an obvious cause. A free in-home inspection from Creative Home Improvement LLC will give you a clear and honest assessment.
Business information
Creative Home Improvement LLC
Address: 37 Commodore Ave, Shelton, CT 06484
State: Connecticut (CT) | City: Shelton
Phone: 1 203 9295 737
Email: andy@creativehomeimprovementllc.com
Google Maps: https://maps.app.goo.gl/Xr46yMcfB8j8g3a36
Website: www.creativehomeimprovementllc.com

 English
 Arabic
 French
 Spanish
 Portuguese
 Deutsch
 Turkish
 Dutch
Dutch
 Russian
 Romaian
 Portuguese (Brazil)
 Greek
Greek